How to use Air-Dry clay (Hard & Strong)
How to use Air-Dry clay (Hard & Strong)
Category: Learning Corner
The (Not So) Secret of Round Sculpting with Air-Dry Clay.
Sculpting three-dimensional artworks with NARA Air-Dry Clay differs significantly from sculpting with oil-based clay, such as...
- Oil-based clay can be sculpted directly, whether creating a structure or not. However, it is recommended that NARA Air-Dry Clay be used with a structure.
- Oil-based clay can be sculpted with large pieces of clay without waiting for it to dry. However, NARA Air-Dry Clay requires thin pieces of clay and needs time to dry.
So, I would recommend using the technique of NARA Air-Dry Clay to achieve smooth and beautiful results in your work.

What is crucial for round sculpting with NARA Air-Dry Clay is a structure.
The advantage of creating a slightly larger structure and using less clay not only saves material but also accelerates the drying process, resulting in a lighter weight.
The material used to create the structure can be chosen based on suitability. If the piece is not very large, using only aluminum foil is sufficient. However, for larger pieces, it is advisable to have an internal wire armature to provide strength.


After completing the structure, you can start sculpting the first layer. Begin by applying thin layers of clay and then wait for them to dry. After it is dry, you can continue sculpting for the next layer. It's essential to apply a thin layer of clay because using a thicker layer may cause the surface to crack or wrinkle.
NARA Air-Dry Clay can dry on its own when exposed to air. However, in humid conditions, it may take longer to dry than usual.
I have tried using a heat gun to expedite the drying process. This method is effective when working with thin layers of clay. For thicker layers, using a heat gun only dries the outer surface, leaving the inner layers still soft. This can lead to the creation of cracks in the artwork.
Caution:
The use of heat may cause the clay to change color or result in uneven coloring. It is advisable to use heat with caution. However, if you intend to paint after drying, there should be no issue. Simply apply a base coat and then start painting.
Always remind yourself: NARA Air-Dry Clay must be applied in thin layers, allowing it to dry before sculpting with the next layer. This includes the decorating phase of the artwork.
NARA Air-Dry Clay has a quite sticky texture. I choose plastic sculpting tools because the clay doesn't adhere much to them.
A helpful tip is to dip the tools in water or apply Vaseline before using them.


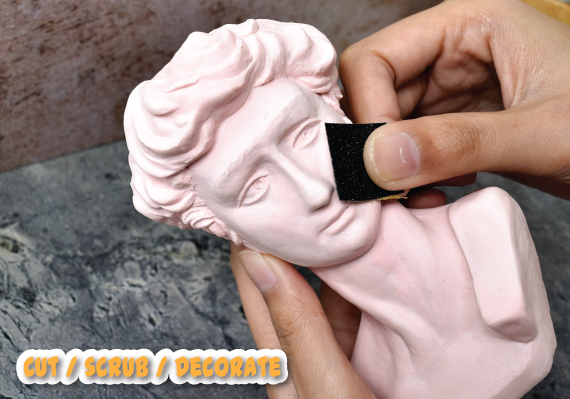
After drying, it can be cut, sanded, and decorated. The main tools I choose to use are sandpaper, a knife, and a scalpel.
- A knife or cutter is used for trimming in areas that are not too thick because NARA Air-Dry Clay becomes relatively hard after drying. If you want to cut thicker sections,
I recommend switching to a saw; it is more suitable. -
Successfully completed with how to use NARA Air-Dry Clay (Hard & Strong). Hope you can apply it to achieve smooth and beautiful results in your work !

27 September 2024
Viewed 90 time


